How to Install Linoleum Flooring Without Losing Your Mind

Why I Started Installing Linoleum Flooring Myself
I still remember the first time I tried installing linoleum flooring in an old laundry room. I thought it was gonna be one of those “easy weekend DIY projects” people brag about online. You know the type. A couple hours, maybe a pizza break, and boom — beautiful new floor.
Yeah… not exactly.
By the second hour I had glue on my hands, one crooked seam near the doorway, and a utility knife blade so dull it was basically chewing the flooring instead of cutting it. But honestly, after finishing that room and learning from a few dumb mistakes, I realized linoleum flooring installation is actually very manageable for homeowners if you slow down and prepare right.
What surprised me most was how durable real linoleum flooring is compared to cheap peel-and-stick vinyl. It’s eco-friendly, naturally resistant to bacteria, and holds up really well in kitchens, mudrooms, laundry spaces, and even small bathrooms. Plus it has that classic old-school look that somehow still feels modern.
If you’re thinking about installing linoleum flooring yourself, this guide is basically everything I wish someone had told me before I started.
What Is Linoleum Flooring, Really?
Understanding the Difference Between Linoleum and Vinyl
For years I thought linoleum and vinyl flooring were basically the same thing. Turns out, they’re pretty different.
Real linoleum flooring is made from natural materials like:
- Linseed oil
- Cork dust
- Wood flour
- Limestone
- Natural pigments
Vinyl flooring, on the other hand, is synthetic. Nothing wrong with vinyl necessarily, but linoleum tends to last longer and feels a little more solid underfoot.
One contractor I worked with years ago told me, “Linoleum ages like leather if you take care of it.” Weird comparison, but honestly kinda true.
The biggest downside? Linoleum installation requires more patience. It isn’t as forgiving as floating vinyl plank flooring.
Tools and Materials You’ll Need
Don’t Start Without These
I learned this the hard way after making three trips to the hardware store in one afternoon.
Here’s what you’ll actually need for a proper linoleum floor installation:
Basic Tools
- Tape measure
- Chalk line
- Utility knife with extra blades
- Straight edge or metal ruler
- Flooring roller
- Trowel for adhesive
- Jigsaw for corners and vents
- Knee pads (seriously, buy them)
Materials
- Linoleum flooring sheets or tiles
- Flooring adhesive
- Underlayment if needed
- Seam sealer
- Floor patch compound
- Moisture barrier
One thing people skip too often is extra blades. Linoleum dulls blades faster than expected. A sharp blade makes cleaner cuts and fewer mistakes.
And trust me, jagged cuts near door trim will annoy you forever once the project is done.
Preparing the Subfloor Properly
The Part Everyone Rushes Through
This is probably the least exciting step, but it matters the most.
A linoleum floor will show every bump, dip, screw head, and crack underneath it. Every single one. I once ignored a small ridge in plywood because I figured “eh, close enough.” Three months later you could visibly see it through the floor.
That mistake was humbling lol.
Your Subfloor Needs To Be:
- Clean
- Dry
- Smooth
- Level
- Structurally solid
Sweep everything first. Then vacuum. Then honestly vacuum again.
Fixing Low Spots and Cracks
Use floor patch compound for imperfections. Let it dry completely before sanding smooth.
If your floor squeaks or flexes when walking, fix that first too. Linoleum hates movement underneath it.
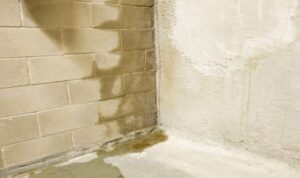
Moisture is another big issue. Concrete subfloors especially can trap moisture and ruin adhesive bonding. I’ve seen entire corners curl up because moisture testing was skipped.
Not fun.
Measuring the Room Correctly
Measure Twice, Cut Once Actually Matters Here
I used to think that phrase was just something old guys said at hardware stores.
Nope. It’s real.
Linoleum flooring isn’t cheap enough to waste large pieces because of bad measurements.
Here’s What Works Best
Measure:
- Length of the room
- Width of the room
- Doorways
- Floor vents
- Closets
- Odd corners
Add at least 2–3 inches extra on each side. Walls are rarely perfectly straight, especially in older homes.
I worked in one house where the “square” kitchen was off by nearly an inch corner to corner. If we had cut exact measurements first, the flooring would’ve been ruined.
Let the Linoleum Acclimate First
Don’t Skip This Waiting Period
This was one of my biggest beginner mistakes.
Linoleum flooring needs time to adjust to room temperature and humidity before installation. Usually around 24 to 48 hours.
If you install it immediately after bringing it home, expansion or shrinking can happen later.
That means:
- Curling edges
- Gaps
- Wrinkles
- Seam separation
Lay the flooring flat in the room where it’ll be installed. Keep the room around normal living temperature.
It feels annoying to wait, I know. But waiting saved me from redoing an entire hallway once.
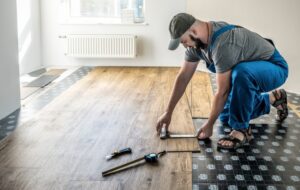
How to Cut Linoleum Flooring
Slow and Steady Wins Here
Cutting linoleum isn’t hard exactly, but it requires patience.
I made cleaner cuts once I stopped trying to rush every piece.
My Process
- Roll the flooring out fully
- Rough cut oversized sections
- Fit carefully into place
- Trim edges gradually
A straight edge is your best friend here.
For tricky cuts around:
- Toilets
- Door jambs
- Cabinets
- Pipes
I like making paper templates first. Sounds old fashioned maybe, but it works.
And honestly, tiny mistakes around pipes become super visible later.
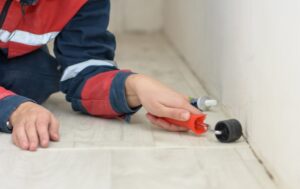
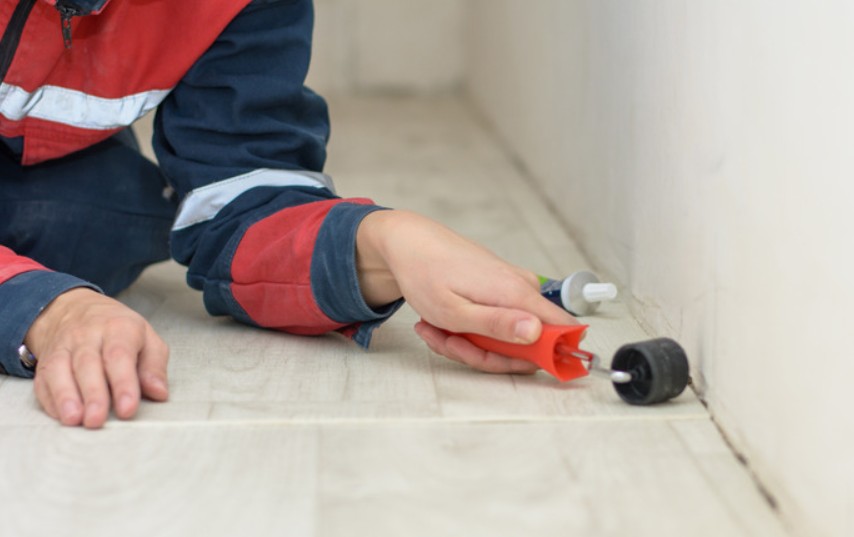
Applying Adhesive the Right Way
This Part Gets Messy Fast
Floor adhesive has a way of ending up everywhere except where you want it.
The first room I did looked like a glue crime scene by the end.
Tips That Helped Me
Use the adhesive recommended by the flooring manufacturer. Different linoleum products require different adhesives.
Spread it evenly using the proper trowel notch size.
Too much adhesive:
- Causes bumps
- Creates seepage at seams
- Makes cleanup miserable
Too little adhesive:
- Leads to loose spots
- Causes bubbling later
Work in sections instead of trying to glue the entire room at once.
That was a lesson learned the sweaty way.
Laying the Linoleum Flooring Smoothly
Air Bubbles Are the Enemy
Once the flooring is positioned, press it down gradually.
Don’t just drop the whole sheet into adhesive and hope for the best.
Use:
- A flooring roller
- Or a rolling pin in small rooms if you’re desperate like I was once
Push outward from the center to remove trapped air.
I skipped rolling thoroughly in one closet because I figured nobody would notice. A bubble formed later and every time I opened the closet door I saw it staring back at me like some tiny flooring failure reminder.
So yeah. Roll everything properly.
Dealing With Seams
The Trickiest Part of Sheet Linoleum
Seams can either look nearly invisible or painfully obvious.
There’s not much middle ground.
What Helped Me Most
Overlap seams slightly before cutting.
Then use a double-cut method:
- Cut through both layers together
- Remove excess pieces
- Align edges tightly
This creates cleaner seam matches.
Use seam sealer afterward if recommended by the manufacturer.
I once tried “eyeballing” seam alignment because I got impatient late at night. Big mistake. Morning sunlight exposed every flaw instantly.
Natural daylight is brutally honest with flooring projects.
Installing Linoleum Tiles vs Sheets
Tiles Are Easier for Beginners
If it’s your first flooring project ever, linoleum tiles might honestly be less stressful.
Sheet linoleum looks cleaner overall but is harder to maneuver.
Tile Advantages
- Easier to replace later
- Simpler cuts
- Better for small spaces
- More forgiving mistakes
Sheet Advantages
- Fewer seams
- More water resistant
- Smoother appearance
- Better for large rooms
Personally, I prefer sheet linoleum in laundry rooms and kitchens because fewer seams means less moisture problems over time.
But for DIY beginners? Tiles can save your sanity a little bit.
Common Mistakes That Ruin Linoleum Flooring
Stuff I Wish I Knew Earlier
There are a few mistakes that seem small during installation but become huge headaches later.
Installing Over Uneven Floors
This is probably the biggest one.
Linoleum conforms to whatever is underneath it. Every dip and bump eventually becomes visible.
Using the Wrong Adhesive
Not all adhesives are compatible. Read the label carefully.
Cutting Too Tight Against Walls
Linoleum needs tiny expansion space near edges.
Ignoring Moisture Problems
Especially in basements or bathrooms.
Moisture damage can happen slowly and silently. Then suddenly adhesive failure starts appearing.
And honestly? Repairing failed flooring is way harder than installing it right the first time.
Best Rooms for Linoleum Flooring
Where Linoleum Really Shines
After installing flooring in several homes, I think linoleum works best in:
Kitchens
It handles foot traffic well and cleans easily.
Laundry Rooms
Water resistance helps a ton here.
Mudrooms
Dirt and moisture are easier to manage.
Basements
Only if moisture issues are fully addressed first.
One older homeowner told me she’d had linoleum in her kitchen for almost 30 years. That kinda sold me on its durability right there.
Cleaning and Maintaining Linoleum Floors
Easy Maintenance Is One Big Advantage
This is honestly one reason I still recommend linoleum today.
Cleaning is simple:
- Sweep regularly
- Damp mop occasionally
- Avoid soaking with water
Harsh chemical cleaners can dull the finish though.
I usually stick with mild floor cleaner and warm water.
Also:
- Put felt pads under furniture
- Use rugs near entrances
- Clean spills quickly
A little maintenance goes a long way.
How Long Does Linoleum Flooring Last?
Longer Than Most People Expect
Properly installed linoleum flooring can last:
- 20 years
- 30 years
- Sometimes longer
That durability surprised me.
Cheap flooring often starts peeling or separating within a few years, especially in busy homes.
Linoleum holds up better than people think if:
- The subfloor is solid
- Adhesive was installed correctly
- Moisture is controlled
Honestly, most failures I’ve seen weren’t because of the material itself. They happened because shortcuts were taken during installation.
Is DIY Linoleum Installation Worth It?
My Honest Experience
I think it depends on your patience level more than your skill level.
You don’t need to be some master carpenter to install linoleum flooring. But you do need:
- Careful measuring
- Patience
- Prep work discipline
The actual installation gets easier once the floor prep is done properly.
Would I do it again myself?
Yeah, definitely.
Even after all the frustrating parts, there’s something satisfying about standing back and seeing a smooth finished floor you installed with your own hands. Especially when you remember what the room looked like before.
And weirdly enough, every tiny mistake teaches you something useful for the next project.
Even if you cuss a little during the process. Which… probably will happen.
Conclusion
Installing linoleum flooring isn’t the quickest DIY project in the world, but it’s absolutely one of the more rewarding ones. The biggest lesson I learned was that preparation matters way more than speed. A smooth subfloor, accurate measurements, proper adhesive, and patience during installation will make the difference between a floor that lasts decades and one that starts peeling in a year.
I’ve messed up cuts, rushed seams, and ignored small bumps before. Every single shortcut came back to haunt me later. But once I slowed down and treated each step carefully, the results got dramatically better.
Linoleum flooring is durable, eco-friendly, comfortable underfoot, and honestly pretty underrated these days. For kitchens, laundry rooms, mudrooms, and busy family spaces, it’s hard to beat the value.
If you’re willing to take your time and accept a few learning moments along the way, this is definitely a project most homeowners can handle themselves.
FAQ About Installing Linoleum Flooring
Can you install linoleum flooring over existing flooring?
Sometimes, yes. Existing floors must be smooth, secure, clean, and level. Uneven tile, damaged vinyl, or loose flooring underneath will usually cause problems later.
How long should linoleum flooring acclimate before installation?
Most manufacturers recommend 24 to 48 hours inside the room where it will be installed. This helps prevent shrinking or expanding after installation.
What is the best subfloor for linoleum flooring?
Plywood and properly prepared concrete work best. The surface should be smooth, dry, and free from cracks or bumps.
Do you need underlayment for linoleum flooring?
Not always. Some linoleum products can be installed directly over approved subfloors, while others may require underlayment for smoother results.
How long does linoleum flooring adhesive take to dry?
Most adhesives need about 24 hours before light foot traffic and up to 72 hours for full curing. Always check the manufacturer instructions because drying times can vary.
Is linoleum flooring waterproof?
Linoleum is water-resistant but not fully waterproof. Standing water can damage seams and adhesive over time if spills are not cleaned quickly.
Can beginners install linoleum flooring themselves?
Yes, especially smaller rooms or tile versions. The hardest parts are usually floor prep, accurate cutting, and seam alignment.
What’s the difference between linoleum and vinyl flooring?
Linoleum is made from natural materials like linseed oil and cork dust, while vinyl flooring is synthetic. Linoleum is generally more eco-friendly and can last longer when maintained properly.
How do you clean linoleum floors after installation?
Use a soft broom or vacuum regularly and damp mop with mild cleaner. Avoid excessive water and harsh chemicals that can damage the finish.
How long does linoleum flooring last?
With proper installation and maintenance, linoleum flooring can last 20 to 40 years in many homes.